Posts

Showing posts with the label updos

Hair Tutorial/ /Holiday Hairstyle

Image
Here is one of my holiday updos!  Dutch braids wrapped loosely around her bottom and a cute volumized middle parting, finished off with a delicate little bow on top! ♡Anna         

Hair Tutorial/ /Dance Hair

Image
I got the privilege to do some dance hairstyles! For the first style, we chose to do an updo with a side braid sweeping back towards the bun. To keep it balanced, I added a small twisted braid on the opposite side.  The last style was simply curly. ♡Anna

Hair Tutorial/ /Dutch braided pigtail buns

Image
Dutch braids are the opposite of a french braid. Instead of taking the strands over, like you would normally do in a french braid, you take the strands under the middle strand as you braid. It's hard to explain, but there are countless Youtube videos to help! And of course the best thing you can do is practice.     Here you can see I gathered the pigtails together into a bun at the base of her neck. Which ended up really elegant looking. Hope you liked the hairstyle! ♡ Anna

Hair Tutorial/ /How to Build a Braided Bun

Image
This updo is possibly my most favorite. Super easy and simple to do. Gives a touch of elegance and fun.  How I did it All right, so what you're going to do first is section the pieces framing the face away from the rest of the hair. Then section another area starting 4 inches from the nape of the neck, (this is going to be your base). The crown will be put in an elastic after being volumized (teased). Braid your base section with a braid of your choice, I chose to do a dutch braid. Wrap the braid and the strands coming from your elastic into a bun by twirling it in circles and then pinning it into place with bobby pins. Determine what your desired look will be and style the pieces framing the face by draping them towards the back and pinning them. I chose to do a simple rope braid for this look and left out a few little strands to curl.  What I used ♡Anna

Hair Tutorial/ /Twisted Double Updo

Image
Tried this on my sister and it actually turned out okay. At first, I was a bit afraid she'd look like a distorted Princess Lei in the end, but it turns out she worked it. I'm going to try to describe how I managed this hairstyle. Perhaps in the future, there will be video tutorials? But this will have to do, for now anyway. Begin with already textured hair. I find it's much easier to work with whenever you choose to do an updo, especially buns. My sister's hair is already naturally curly/wavy so all we did beforehand was add some plump moisturizing mouse. Section off the hair after you find your parting. Leave two parts closer to the front of your face out- you'll use those pieces to twist back into the buns. Divide the hair in the back into two horizontal parts. Create your buns by twisting the gathered hair and capture it with an elastic. Do the same with the other half. To mix it up, I twisted them both in opposite directions, that way they would ...

Hair Tutorial/ /Emma Hair

Image
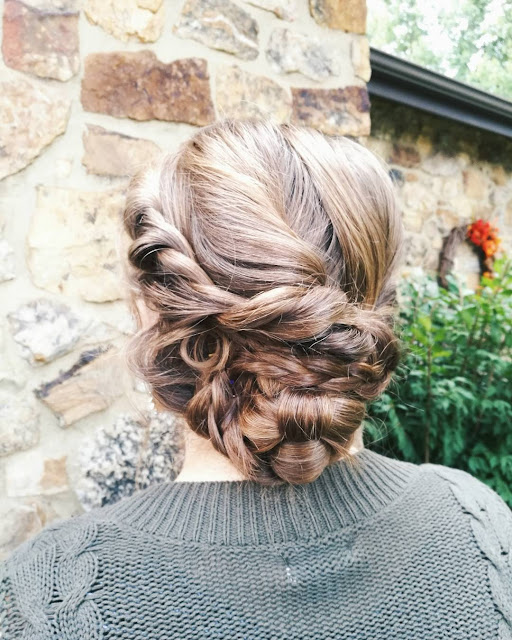
As you can see this hairstyle expresses quite a bit of volume, as well as curls. Not only is this updo elegant and voluminous, it has an essence of historical beauty. If I'm not braiding or reading, you'll most likely find me watching BBC adaptions of Jane Austen's classics, such as  Pride & Prejudice ,  Sense & Sensibility , and my personal favorite,  Emma . The character that is portrayed in the miniseries is by far the perfect portrait of who I imagined Emma to look like. Especially the hair. Her effortless curls and perfect updos are some of the most beautiful looks. This weekend I attempted to recreate one of them. To achieve this 'Emma' hairstyle you will want, to begin with freshly washed and blown-dry hair. If you already have two-day texture, it should work fine. Although, you might wish to add some dry shampoo to increase the level of volume. I used my NuMe 32mm curling wand  for these slight curly/waves. ...