Posts

Showing posts with the label hair tutorials

Hair Tutorial/ /Holiday Hairstyle

Image
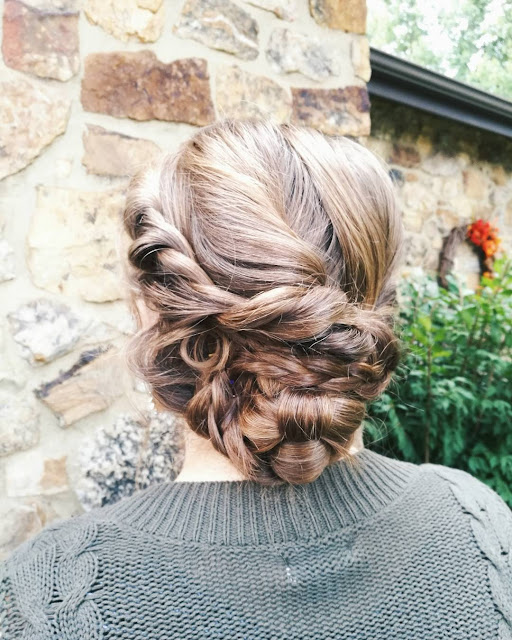
Here is one of my holiday updos!  Dutch braids wrapped loosely around her bottom and a cute volumized middle parting, finished off with a delicate little bow on top! ♡Anna         

Hair Tutorial/ /Dutch braided pigtail buns

Image
Dutch braids are the opposite of a french braid. Instead of taking the strands over, like you would normally do in a french braid, you take the strands under the middle strand as you braid. It's hard to explain, but there are countless Youtube videos to help! And of course the best thing you can do is practice.     Here you can see I gathered the pigtails together into a bun at the base of her neck. Which ended up really elegant looking. Hope you liked the hairstyle! ♡ Anna

Hair Tutorial/ /Fishtail Bubble Braid

Image
The fishtail is classic for looking like a mermaid braid. The bubble fishtail braid looks even more like something from under water! When doing the normal fishtail braid you simply take a section of hair and divide it into two. Giving parts of each section repeatedly creates the traditional fishtail braid. However, to do the bubble fishtail braid you'll stop after 6 or 7 "trade-offs" and end it with an elastic to divide the braid and make it look like bubbles!  Here are the tools I used to create this look: ♡Anna

Hair Tutorial/ /How to Build a Braided Bun

Image
This updo is possibly my most favorite. Super easy and simple to do. Gives a touch of elegance and fun.  How I did it All right, so what you're going to do first is section the pieces framing the face away from the rest of the hair. Then section another area starting 4 inches from the nape of the neck, (this is going to be your base). The crown will be put in an elastic after being volumized (teased). Braid your base section with a braid of your choice, I chose to do a dutch braid. Wrap the braid and the strands coming from your elastic into a bun by twirling it in circles and then pinning it into place with bobby pins. Determine what your desired look will be and style the pieces framing the face by draping them towards the back and pinning them. I chose to do a simple rope braid for this look and left out a few little strands to curl.  What I used ♡Anna

Hair Tutorial/ /Sun Kissed Balayage

Image
Yesterday at school, I messaged my sister asking her if she felt brave. Turns out she was! She's wanted balayage on her hair every since it first became popular. As soon as I learned how to do it, I promised that she would be the first. Here are the before and after pictures. Before After My sister's hair is insanely thick. We started right after lunch (about 1'o clock) and I washed her out right at 3:30. To keep the hair from going white, I had to make a mixture of water and conditioner and spray the painted sections while working up.  In the end she loved it! I'm so tickled the way her hair turned out! She looked absolutely beautiful before, but now she's glowing even more so! What I used: Joico Blonde Life Lightener 20 Vol. Matrix Creme Developer 10 Vol. Matrix Creme Developer Meche Strips ♡ Anna

Personal Post/ /Beauty School Update

Image
So far every day in beauty school has been amazing! Learning new things every day is what I LOVE doing. Let me show you a few of those: • Proper wash & blowdry • 2 types of perms (basic & spiral) • Rollerset (on-base, half-base & off-base) • Cuts (0°, 180° & 45°) • Highlighting w/foils  • Balayage • Coloring (All over & root touch-up) • Hair relaxers (Sodium hydroxide) • Scalp Treatments • Facial massage Basic Perm End result of Basic Perm End result of Rollerset Highlights using the weaving technique Layered haircut (180°) on my sister Blowout All over coloring Hand-painted Balayage  End result of Balayage (straightened) End result of Balayage (curled) I'm still as excited as I was my first day. Can't wait to see what's next!  Thanks for reading Interested in why I chose Beauty School? Check out my  blog post  about it! 

Hair Tutorial/ /Effortless Voluminous Curls

Image
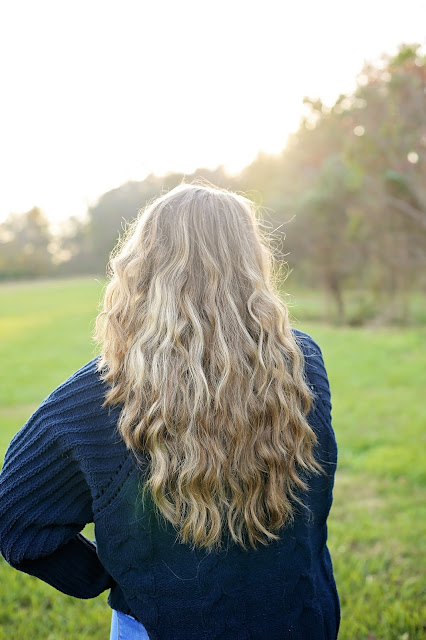
These are, honestly, the most, easiest curls I have ever done. Effortlessly quick and beautifully thick with volume. Who doesn't want that? The products I used to achieve this look.  ↴ How I got there was first use my ALL-TIME favorite heat protectant . Y'all, this stuff is amazing! If you aren't using some form of heat protectant, you really should. Not only does it lessen the amount of time it takes for you to style your hair, it protects it and keeps it from heat damage. Now take the hair and divide into two parts. (You can skip this part if your hair is not as thick. My sister's locks are soooo thick so I had to create two ponytails. But if you can go along with just one, that is perfectly fine.) Separate the top half from the bottom half by a horizontal line. Once sectioned, take some  hair ties  and put the hair in ponytails.  You're going to grab that curling wand and start curling the ends coming from your ponytails. By ...

Hair Tutorial/ /Double Dutch Infinity braid

Image
One of the things I love most is trying out new trends and expanding my knowledge of braids. I came across several different looks with this iconic 'infinity braid' and I was eager to try it! Here's the video that helped me the most.   You can either complete the braid by doing a simple pony at the nape of your neck or finish it with a braid of your choice. I decided to blend it in by using a fishtail technique.  Hope you like it! ♡ Anna

Hair Tutorial/ /The Top Knot

Image
The top knot has become a popular look.  Here are a few tips and tricks to help you create the perfect top knot look! Only grab the very top crown pieces of hair for your knot. If desired, you can tease those pieces for them to looks bigger.  When you wrap it up, twist your hair and pull it through an elastic. Leave a little bit out to create the knot effect.  Pull the edges to make it 'fluffier.'  For a more precise and clean look, you can take the stray pieces of the bun and bobby pin them into the bun.   Don't forget hairspray ! This look is everything that Summer represents; relaxing, simple, effortless, fun, and messy.  ♡ Anna

Hair Tutorial/ /Volumizing Curls

Image
My sister and I were creating pathways through our local college campus while waiting for our mom to finish her photoshoot. Buying time and, as you can see, fancy caffeinated drinks, we had a mini-photoshoot of our own. The tools I used for this look were: Tresemme Thermal Heat Protectant NuMe Classic 19mm Curling Wand Sexy Hair Volumizing Hair Spray ♡ Anna

Hair Tutorial/ /Inverted Pigtails

Image
This look was inspired by one of my favorite Hairstylists, Kayley Melissa . Her hair and everything she does with it is always flawless.  After seeing the following video I had to try it out. I hope you gain motivation to do the same! ♡ Anna

Hair Tutorial/ /Emma Hair

Image
As you can see this hairstyle expresses quite a bit of volume, as well as curls. Not only is this updo elegant and voluminous, it has an essence of historical beauty. If I'm not braiding or reading, you'll most likely find me watching BBC adaptions of Jane Austen's classics, such as  Pride & Prejudice ,  Sense & Sensibility , and my personal favorite,  Emma . The character that is portrayed in the miniseries is by far the perfect portrait of who I imagined Emma to look like. Especially the hair. Her effortless curls and perfect updos are some of the most beautiful looks. This weekend I attempted to recreate one of them. To achieve this 'Emma' hairstyle you will want, to begin with freshly washed and blown-dry hair. If you already have two-day texture, it should work fine. Although, you might wish to add some dry shampoo to increase the level of volume. I used my NuMe 32mm curling wand  for these slight curly/waves. ...

Hair Tutorial/ /Textured Curls

Image
My sister has what all girls want, beautiful,  thick  locks. 30 minutes from leaving for Sunday School, she asks me,  "Anna. Could you curl my hair?" I'm always up for a challenge, so here we are. Textured Curls for a Sunday morning. What I used: NuMe 19mm curling wand Not Your Mother's Clean Freak Dry Shampoo Not Your Mother's Beach Babe Texturizing Sea Salt Spray Sexy Hair Big Sexy Spray & Play Volumizing Hairspray And, yes it only took 30 minutes. Fortunately we don't live too far from church.  The trick is, once you have the piece of hair wrapped around the barrel of the wand, do not leave it on as long. Also, once you've released the lock of hair that's been curled, stretch it to ease some of that structure.  Once done with the desired curled pieces, gently brush through with fingers or a wide-toothed comb. Lift sections and spray in dry shampoo. Squirt some sea salt spray into your pa...