Posts

Showing posts with the label nail art

Beauty/ /Springtime Trends
Image
I'm the first to say that matching colors is not my thing. So I researched a few trendy colors for this Spring and most of them were colors that I found on my nail polish rack (+basket and cabinet, yes I don't have enough nail polish)!   O.P.I  To Infinity & Blue-yond , is a beautiful sky blue that screams Spring! This color is bright and opaque. I only needed 2 coats!  Julep Maddy , is one of my go-to pinks. I love the feminine side of this color. The brightness of this pink is perfect for any girly gal! Essie Cute as a Button , is a gorgeous shade of pink that adds warmth to any look! The reason I chose this one is because of the name (how adorable!) , and the glossy coral color.  ♡Anna

Nail Art/ /Fall Flowers

Image
When the leaves start to turn and the weather gets more chilly is my favorite time of the year. Not only do you get to bring out the cute sweaters and boots out, you can wear appropriate nail polishes that match the season! I love these colors together. Of course, you can wear this design with one nail painted with a different polish. The various flower designs are super-super easy to do. The tools I used to make them were toothpicks. (Yes, can you believe it?) I honestly think they work better than the average acrylic dotting tools because of the smaller size you are able to work with. The polishes featuring this look are: Essie/ /Mamba Sally Hansen/ /Cool Cucumber Sally Hansen/ /Tribal Sun OPI/ /Back Onyx Sally Hansen/ /Expresso Sally Hansen/ /Hard-Core Party OPI/ /Taupe-less Beach Sally Hansen/ /Diamond Shine Top Coat Not sure what to pair these nails with? Recommended look: ♡Anna ...

Nail Art/ /Gradient Look

Image
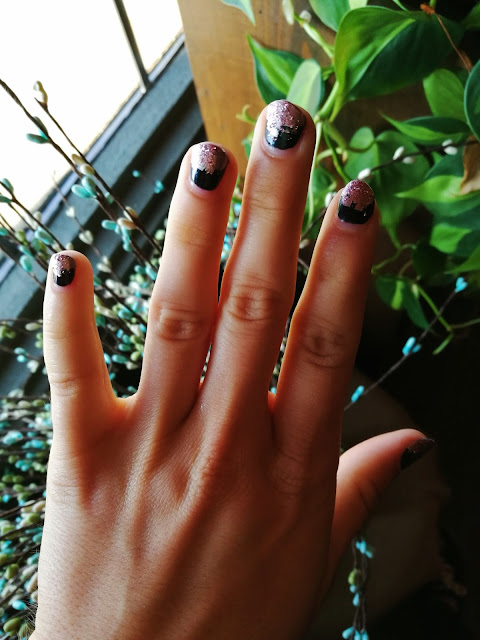
Going for the "gradient" look with this simple nail art design.  Used a dark, forest green as my base polish and coated the tips of my nails with a sparkly pink, gemstone polish. Make sure to clean around the cuticle area with a cuticle stick or some q-tips soaked in acetone. ♡ Anna

Nail Art/ /Accent Lace Florals

Image
Pink is always a good option. Especially when pairing it with nude polishes. For this nail art design, I wanted to go with something simple with a touch of femininity. ♡ Anna

Nail Art/ /Simply Minimalistic

Image
Sometimes you just want a little decor, not too much, but just enough to make you feel unique. This suuuuper-easy nail art design was inspired by the minimal chic look I've seen all over social media. Here are the polishes that were used: Sally Hansen Miracle Gel/ /Birthday Suit n. 110 OPI/ /Cajun Shrimp Hope you like! ♡ Anna

Independence Day 2017

Image
This year my sister and I wanted to do a little something different with our festive nails. Instead of the iconic firework based nail art, we decided to use red-white-and-blue themed floral designs. I think it turned out adorable! Plus you can even work the look after the 4th of July! I couldn't exclude a new hairstyle! I'm calling this one the messiest, twisted updo ever. My sister requested something out of her face and off her shoulders, so I did just that.  "Now the Lord is the Spirit; and where the Spirit of the Lord is, there is liberty." ( II Corinthians 3:17 ) I hope you and your family/friends have a blessed Independence Day! ♡ Anna

Nail Art/ /Tropical Florals

Image
The weather is getting warmer and Summer has finally arrived. By now, you've probably already transitioned your wardrobe over to your shorts and tanks. Or you're just now getting to that... like me. To celebrate the coming favorite season, I created a tropical theme floral nail art design.  I used a variation of tools; toothpicks and acrylic  dotting tools . Here are the following polishes I used: Sinful Colors/ /Top Shine Clear Coat OPI/ /Infinite Shine/ /To Infinity and Blue-yond Essie/ /Mamba Butter London/ /Greenery OPI/ /Alpine Snow OPI/ /Cajun Shrimp Sally Hansen Miracle Gel/ /Top Coat After polishing the nails in a base coat (I just used a regular top coat) , I coated the nails twice using the warm blue. Then with the dotting tools , I began to create small polka-dots along the edges of the nail. Painting short strokes surrounding the dots with the light tan/peachy color. I used the toothpicks to make fine branche...

Nail Art/ /Galaxy

Image
These Galaxy nails are surprisingly super easy to do! Hopefully I can do a tutorial soon on them! ♡ Anna

Nail Polish Swatch//Sensational® Gel Nails Review & Tutorial

Image
Sensational® Gel Nails Starter Kit Contains: Gel Cleanser Gel Primer Gel Color Gel Base & Top Coat 22 Nail Shields Lint Free Wipes Double-Sided Nail Buffer Manicure Stick SensationalNail® Gel LED Lamp w/plug-in outlet Paper Instructions The polish that I am wearing in the picture does not belong with the Sensational Gel Nail Kit.  Instructions: First things first, you'll want to remove all polish from your nails. Once your nails are clean and unpolished, you'll want to begin by plugging in your SensationalNail® Gel LED Lamp. Prepare the nails. Use the included file and lightly shape your nail tips to the desired length. Flip the buffer over to the pink side and buffer the whole nail. It is recommended that you use some of the GEL Cleanser to wipe off the dust on your nails before beginning to polish. By using the Lint-Free Wipes you can pour some of the Gel Cleanser on the nails to clean them. Apply the Gel Primer to all th...

Nail Art/ /Dotted Christmas Tree

Image
In the midst of this Holiday season, it's always important to not get distracted in the rush of things, such as buying gifts, staying up past your bedtime wrapping presents, baking naughty truffles and sweet chocolatey goodies. Take time to spend with family. One of my favorite things to do on my own is to have a movie marathon. Every year my sister and I like to start up a Christmas classic and do each other's nails. We love exploring different designs and festive looks. This year it was the simple and traditional Christmas tree. The list of polishes I used: Pacifica's Red Red Wine OPI, Alpine Snow Cirque Colors, xx    Sally Hansen, Miracle Gel Top Coat What to do next: Paint your base color first.  To make the tree, I simply dotted a triangular shape on my ring finger with the white polish using a dotting tool, ( here are some inexpensive tools I have ).  The rest of the nails are decorated with the sparkle p...